What Causes Automatic Transmission To Fail? You are reading this article because you want to find out what makes an automatic transmission to fail. Yes a lot of things can actually be responsible for the failure of an automatic transmission and we are going to explain them here. But before that let us briefly consider what an automatic transmission is.
What Is an Automatic Transmission?
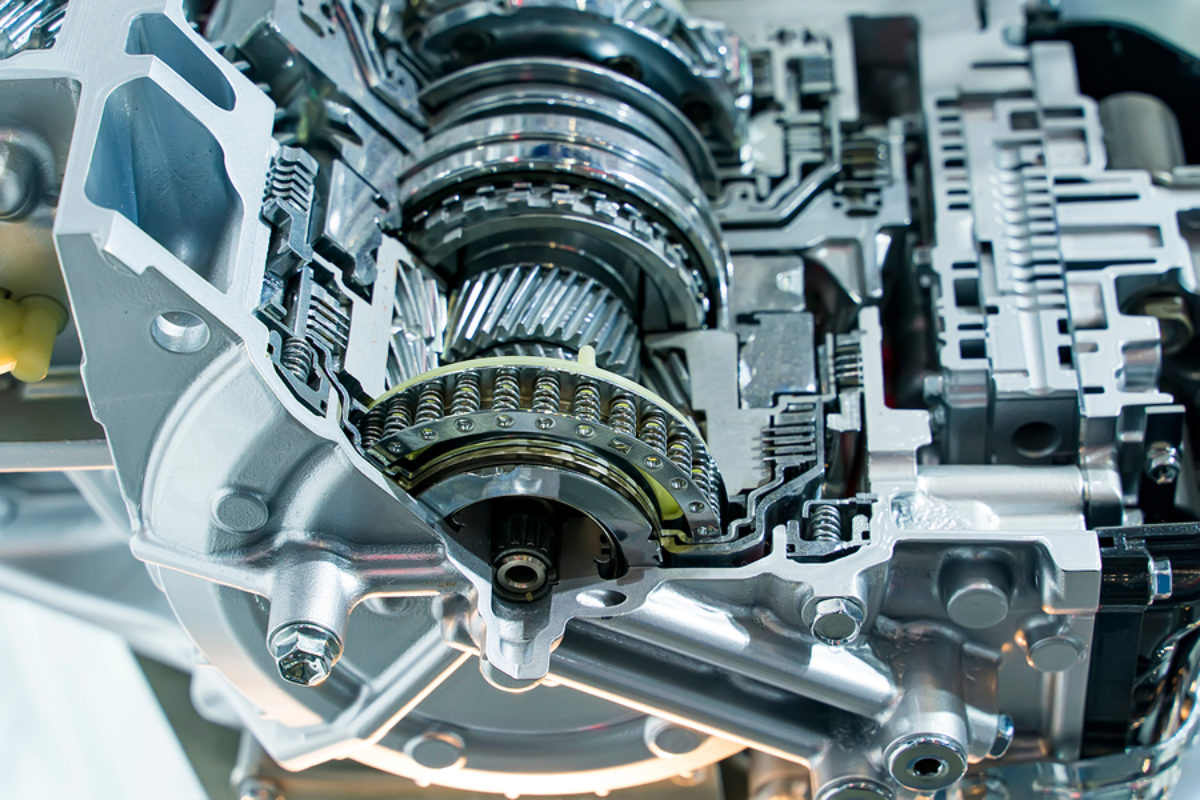
An automatic gearbox is a multi-speed transmission that does not require any driver input to change forward gears. A transaxle is a vehicle that combines a transmission, axle, and differential into a single unit.
The hydraulic automatic gearbox, which employs a planetary gearset, hydraulic controls, and a torque converter, is the most popular form of automatic transmission. Continuously variable transmissions (CVT), automated manual transmissions (AMT), and dual-clutch transmissions are examples of other automatic transmissions (DCT).
Electronic automatic transmissions (EATs) are also known as electronically controlled transmissions (ECTs) or electronic automatic transaxles (EATs) (EATX).
The Sturtevant “horseless carriage gearbox” of 1904 is widely regarded as the world’s first fully automatic transmission. The General Motors Hydramatic four-speed hydraulic automatic gearbox (using a fluid coupling instead of a torque converter) was debuted in 1939 as the first mass-produced automatic transmission.
What Causes Automatic Transmission To Fail?
The following are what usually causes automatic transmission to fail:
Wrong Line Pressure
The ECM in most recent vehicles adjusts the line pressure in the transmission, making modifications extremely simple. Tuners want to increase line pressure to create harder shifts, and this is one of their favorite tricks. In many circumstances, this is OK, but you must use caution. If the line pressure is adjusted too high, severe shifts will occur, potentially breaking internal components.
The input drum in the GM 4L60E, for example, is aluminum, whereas the input shaft is steel. When the transmission “slams,” the drum where the two pieces spline together cracks, and you lose all mobility. Simply apply some common sense.
Bad Throttle Valve Adjustment
The ECM in most recent vehicles adjusts the line pressure in the transmission, making modifications extremely simple. Tuners want to increase line pressure to create harder shifts, and this is one of their favorite tricks. In many circumstances, this is OK, but you must use caution. If the line pressure is adjusted too high, severe shifts will occur, potentially breaking internal components.
The input drum in the GM 4L60E, for example, is aluminum, whereas the input shaft is steel. When the transmission “slams,” the drum where the two pieces spline together cracks, and you lose all mobility. Simply apply some common sense.
Maybe You Installed The Automatic Transmission Wrongly
Let’s begin by putting the torque converter in place. Take a moment before installing the torque converter into the transmission to add some ATF to help with flow on the first fire-up. Before inserting the converter into the transmission, fill it with a quart of fluid. Refer back to the preceding paragraphs in this article to ensure a valid dipstick reading once the transmission and torque converter are installed.
Before you attempt to mount the transmission to the engine block, be sure the torque converter is fully mounted. Tightening the bellhousing bolts will not secure the transmission to the block. You may not have the torque converter fully inserted into the transmission if it won’t go into place.
Although this is subjective, when the converter bottoms out and is fully installed, you should hear a solid “thunk.” Begin by securing the torque converter to the output shaft of the transmission and rotating it at a steady speed. It will slip past the front seal, into the pump bushing, and into the pump. It should get a little tighter to turn when it locks into the pump rotor.
When the transmission is fitted flat to the engine block, there should be between 1/8 and 3/16 of an inch of gap between the flexplate and the torque converter. Add shims between the torque converter and the flexplate if there is too much room. Back up and start over if there is less or if the torque converter is holding your transmission off the block. If there is insufficient clearance, the converter will not fully engage with the transmission, resulting in a broken pump.
Pour 5 or 6 pints into the fill tube once the transmission is securely attached to the block and in the chassis. Start the engine and keep adding fluid until the dipstick reads full. This will be a total of 11 quarts or more in most current transmissions. Take a short test drive and then check the vehicle again after it has sat for a while (around a half hour). During the testdrive, any air pockets that may have been trapped should be burped out. You’re ready to go once you’ve double-checked that the transmission is filled with the correct amount of fluid.
You Don’t Have Transmission Cooler
While the gearbox cooler integrated into your radiator may be sufficient for most commuter vehicles, any car developed for performance usually requires more cooling capacity. Vehicles with improved engine performance, particularly those with higher stall torque converters, require additional cooling to maintain the transmission temperature within acceptable limits.
A stand-alone external cooler with a fan is desirable since it ensures that plenty of air is always circulating through the cooler. Most automatic transmissions work best when the temperature is between 165 and 220 degrees. In general, the cooler the weather, the better. Any transmission’s worst enemy is heat.
You Don’t Service Your Transmission Always
If you drive your car every day, you should change your gearbox fluid and filter once a year. Even if the car is mostly used for weekend or fair-weather cruising, the fluid should be replaced every 12,000 miles or so.
Transmission fluid, like engine oil, undergoes chemical breakdown over time. Transmission fluid provides a variety of functions. The hydraulic medium, for starters, is what makes the transmission work. Second, it keeps the transmission lubricated at all times, reducing wear.
Third, when it cycles through, it cleans the transmission. Finally, it draws heat from within the transmission and permits it to escape through the case or transmission cooler. While the transmission fluid’s ability to lubricate, clean, and dissipate heat does not vary with time, the fluid’s ability to lubricate, clean, and dissipate heat does.
Everything mechanical wears down with time, and the debris that accumulates contaminates the fluid, making it abrasive to the same parts it was designed to protect. This is why we mentioned updating the filter specifically. While a transmission flush is an excellent idea, if you don’t also lower the pan and replace the filter, you won’t be able to remove the dirt that has accumulated, and the filter will eventually clog.
A blocked filter reduces fluid flow, causing transmission damage. No one would replace their engine oil and forget about the filter, but we find transmissions that have been cleaned on a regular basis but still burned up due to a clogged filter time and time again.
Issues With Dipstick
The majority of people are unaware that transmission dipsticks are extremely unreliable. When you consider the length and width of most transmission pans, as well as their shallow depth, it’s easy to see how a dipstick reading of even a quarter-inch off can indicate that your transmission is running low on fluid. This can quickly cause considerable harm in a performance setting where fluid demand is high.
It’s never a good idea to assume your transmission fluid dipstick is in good shape right out of the box. Put the dipstick in place, drop the pan, and make sure the whole mark is even with the bottom edge of the transmission case to check it yourself (where the pan bolts up). Make a new mark on the dipstick if your full mark is too low. Making a small notch in the side of the dipstick using a file is an easy way to do this.
You can now be confident that you have enough fluid for even the most difficult driving circumstances because the dipstick has been examined and correctly marked.